I busted out the old graph paper and drew up a few ideas before I finally decided to just head over to Home Depot and kill some time cruising the isles and finding what I thought I needed. Well after and hour in home depot and $14.94 spent, I had what I wanted and headed home. The project overall took me about an hour and half but was pretty fun to make.
So without further adieu, this is how I made my own spooling station for under $15 and how you can too...
Materials List:
- 1 30" x 6" board of wood (I cut a board I bought down to these dimensions)
- 1 3/16" x 1-1/2" Eye Bolt
- 2 Matching Nuts for Eye Bolt based on thread count (should come with eye bolt)
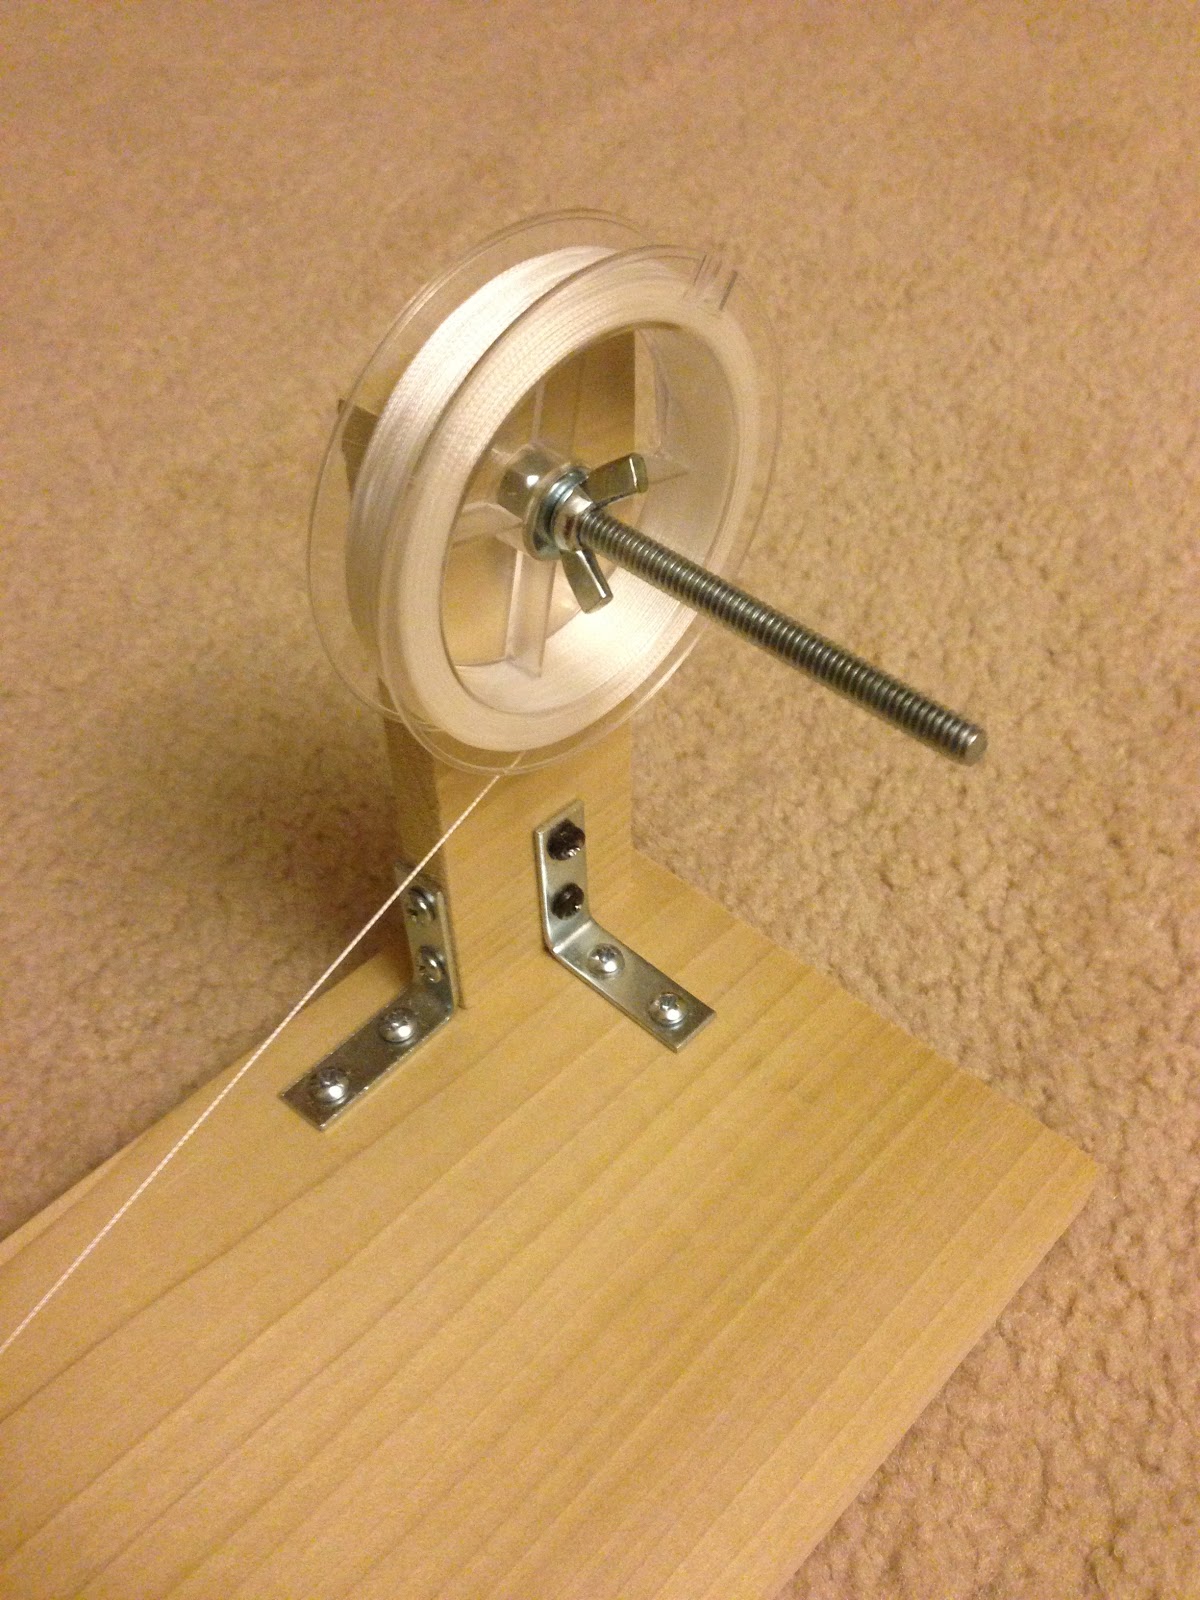
- 1 4" long 1/4" - 20 Hex Bolt
- 1 1/4" - 20 Nylon Lock Nut
- 1 1/4" - 20 Wing Nut
- 1 1/4" Washer
- 4 1-1/2" Corner Brackets
- 14 Small 1/4" Long Screws (any will do, they are to secure the brackets)
- 2 1" Pipe Couplings
- 6 2" Drywall Screws
- Box of Felt Furniture Feet (optional)
- 6" of 3/4" Wood Dowel
- Hammer
- Drill
- 3/4" Drill Bit
- 1/4" Drill Bit
- Screwdriver


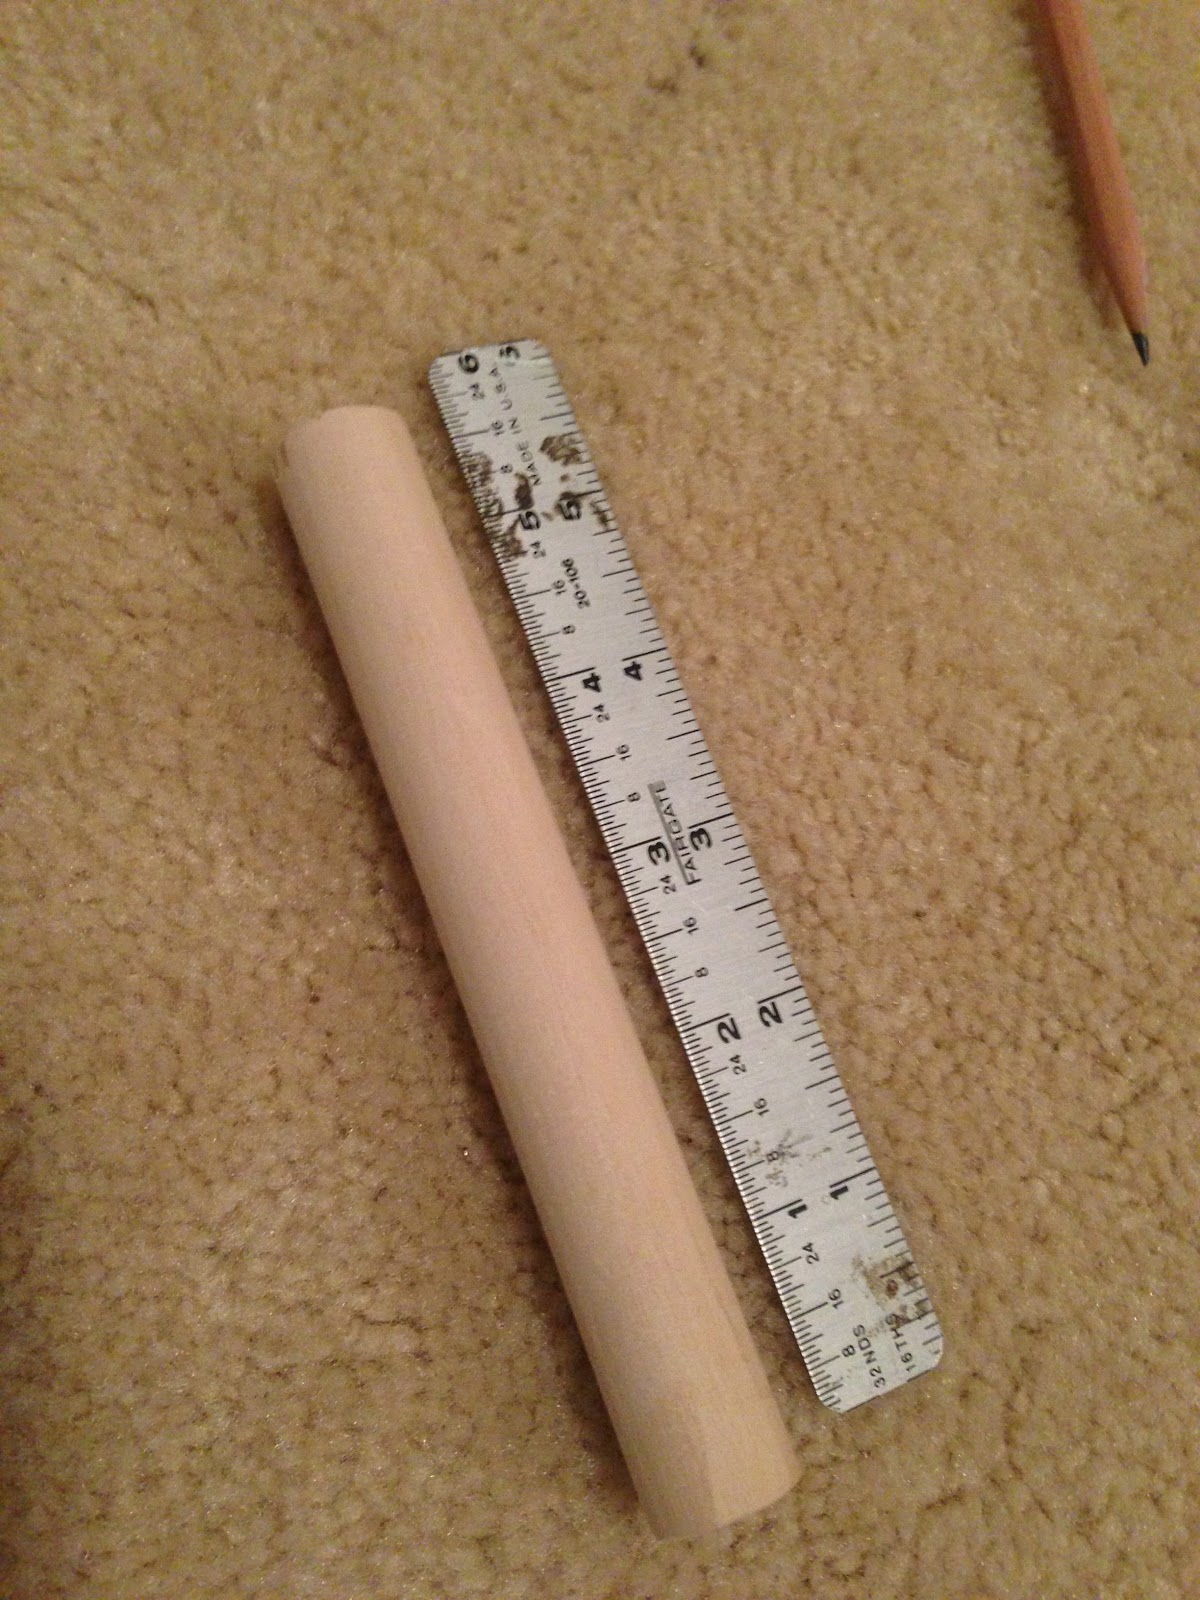
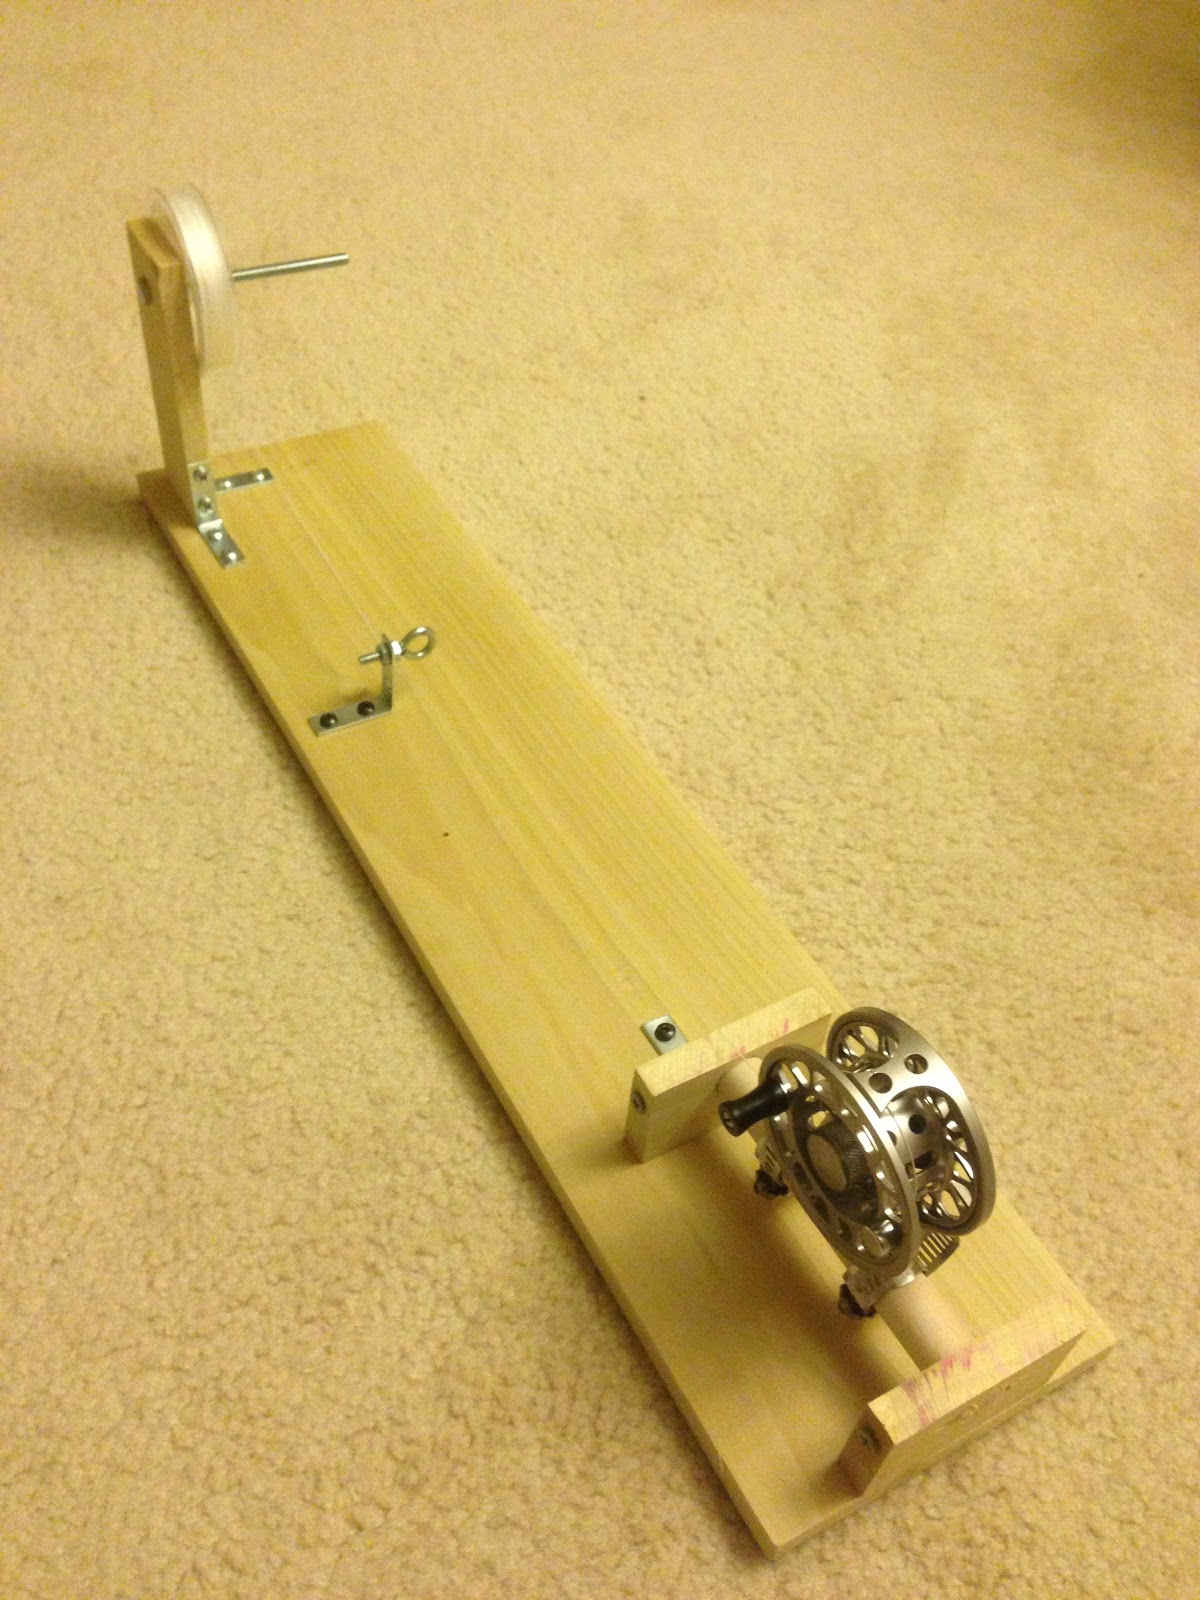
Start off by cutting off a 6" section of your 3/4" dowel if you haven't already done so. Then cut your main base board down to 24" long. With the extra 6" you cut off (should be a 6" x 6" square), cut it into three 6" by 2" sections. Then take one of the sections and cut it in half so you have two 3" x 2" blocks.

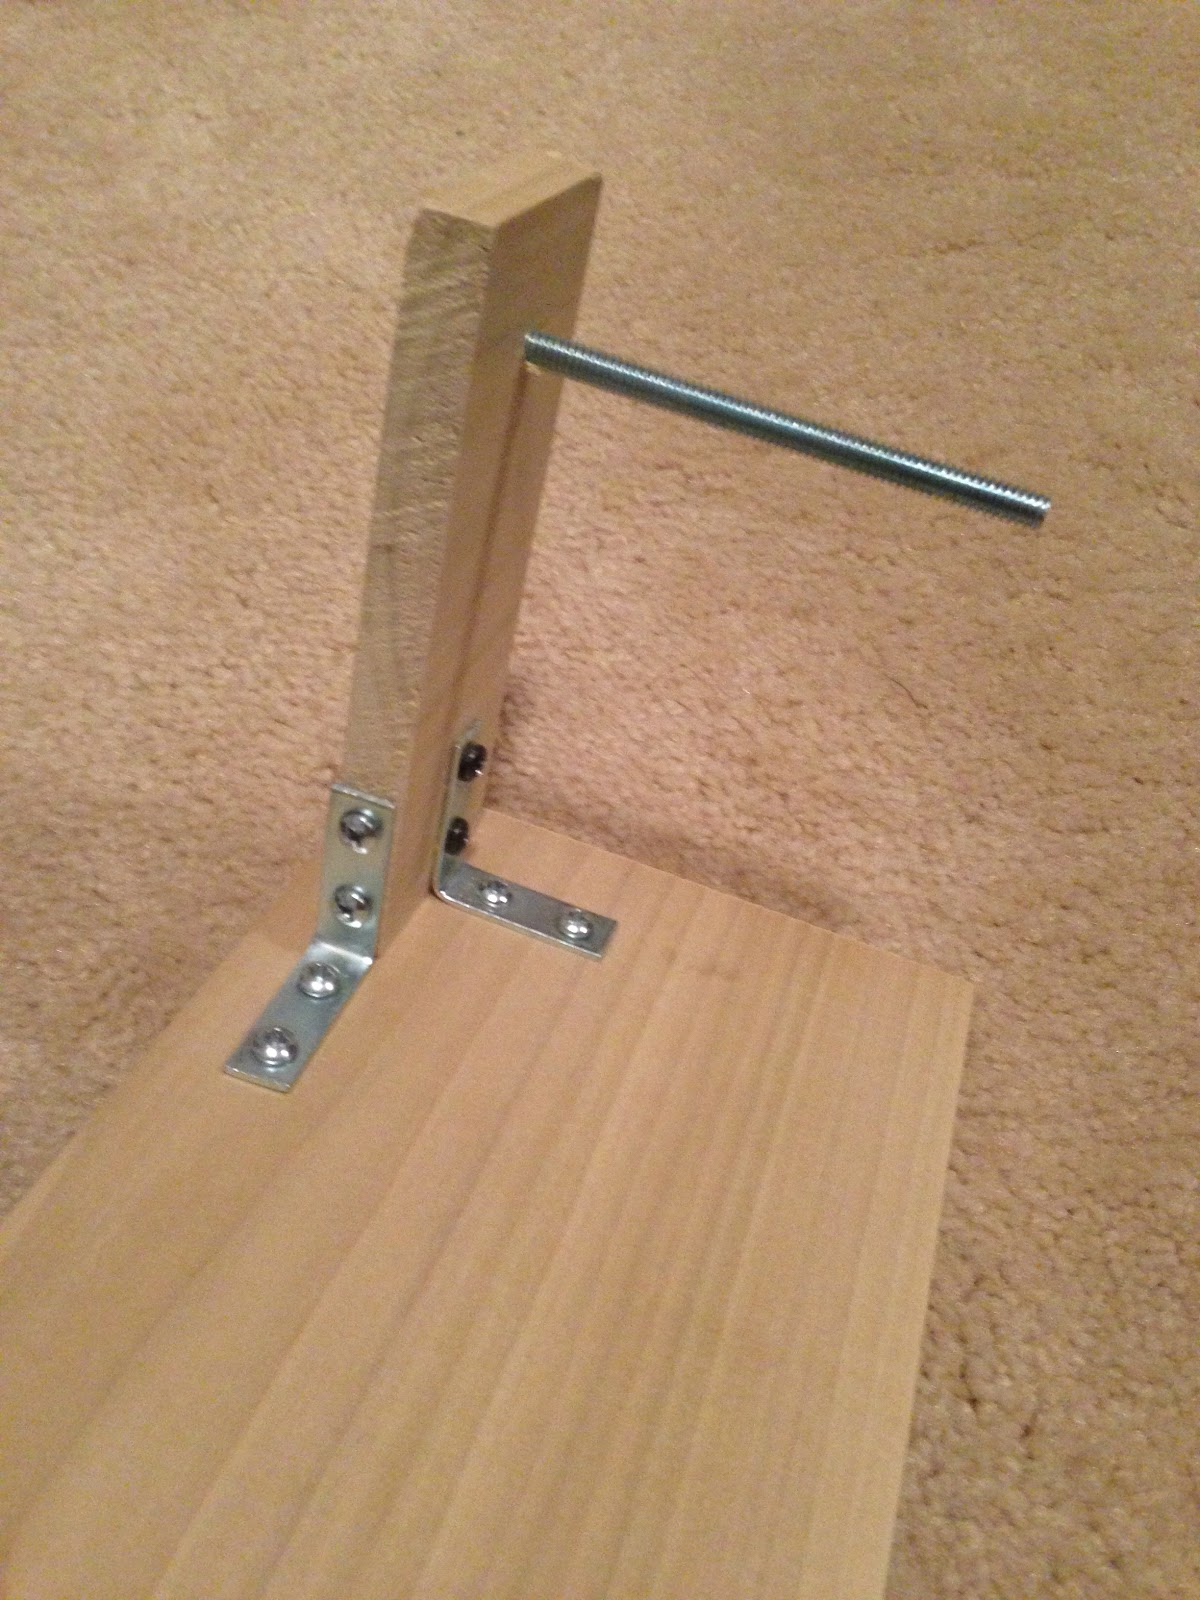
Secure your first corner bracket down to the board 10" from one of the ends with two of your small screws after pre-drilling your holes.

Screw one of your eye bolt nuts onto the eye bolt and place your eye bolt through the bracket's top hole. Then screw the second nut on to the eye bolt as tight as possible to secure the eye bolt in place.

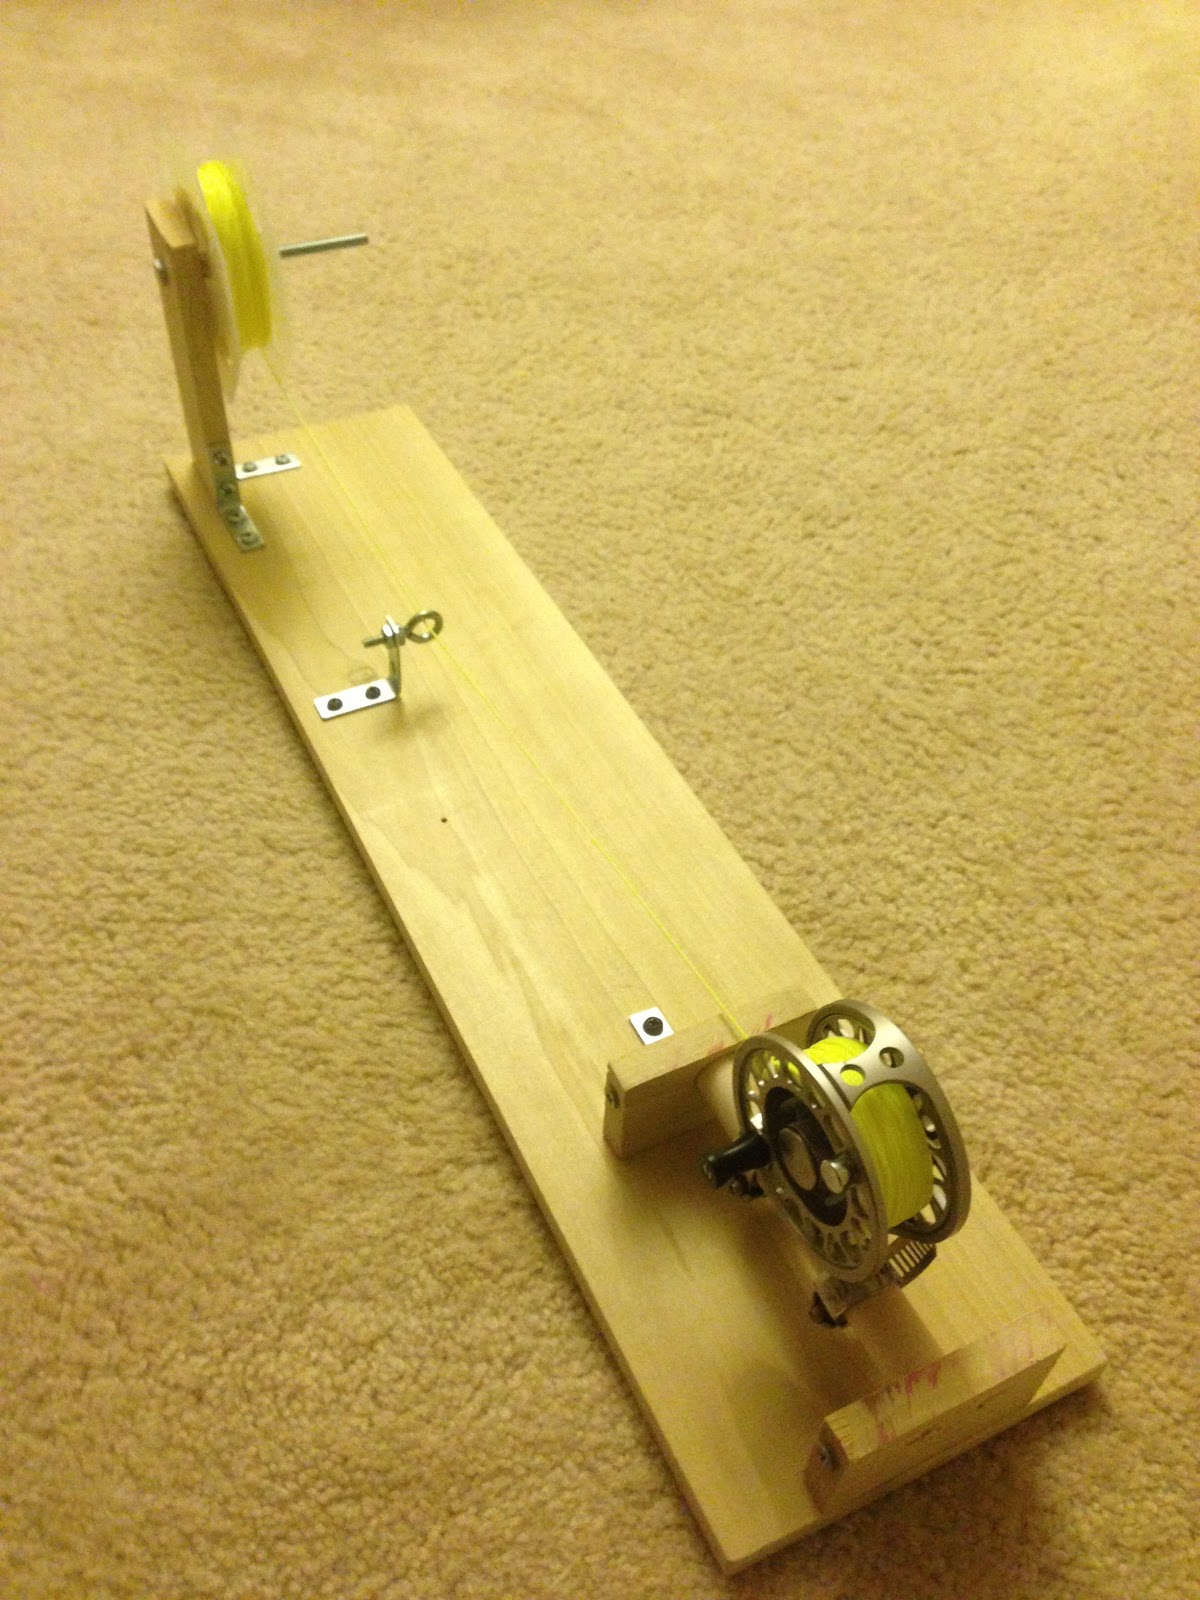
Take your two 3" x 2" blocks of wood and drill a hole 3/4 of the way from the top in the center of the block with your 3/4" drill bit. Place your dowel into one of the holes and hammer it gently so it is flush with the back of your wooden block. You can secure it further with a drywall screw if you'd like (I did so). Slip your couplings onto the dowel and do the same with the other wooden block. Your "reel seat" should look like mine above.

Place your "reel seat" flush with the side of the board furthest from the eye bolt and bracket and make a mark where the front of the "reel seat" is on the board. Place a corner bracket flush with that line so it can be used to help secure your "reel seat". Pre-drill your holes and secure the bracket into the base board.

secure your "reel seat" to the base board with the bracket securing the front of the seat and two drywall screws securing the back of the seat with pre-drilled holes.
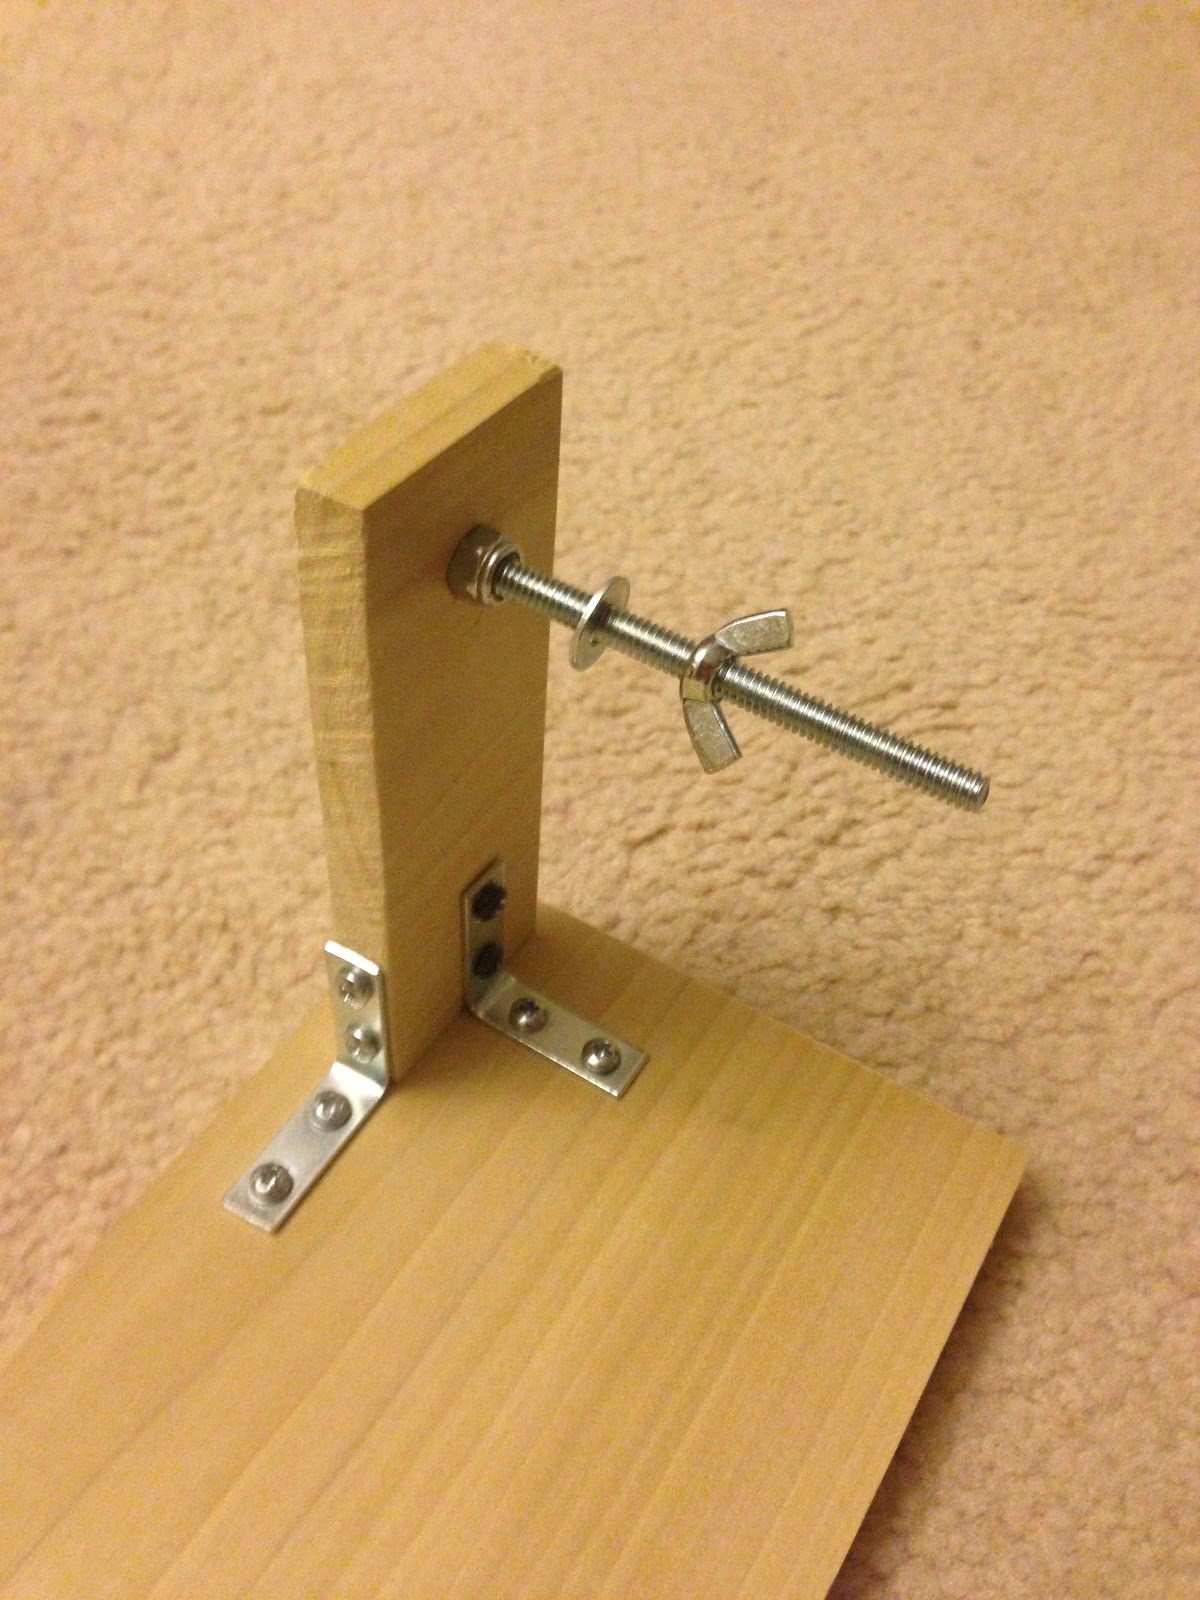
Place a washer on your hex nut and follow it with a wing nut. This is where you are going to place your backing spools or fly line spools. You can always use a second washer but I've found that lets the spool flow too freely and doesn't allow enough tension on the line while spooling.


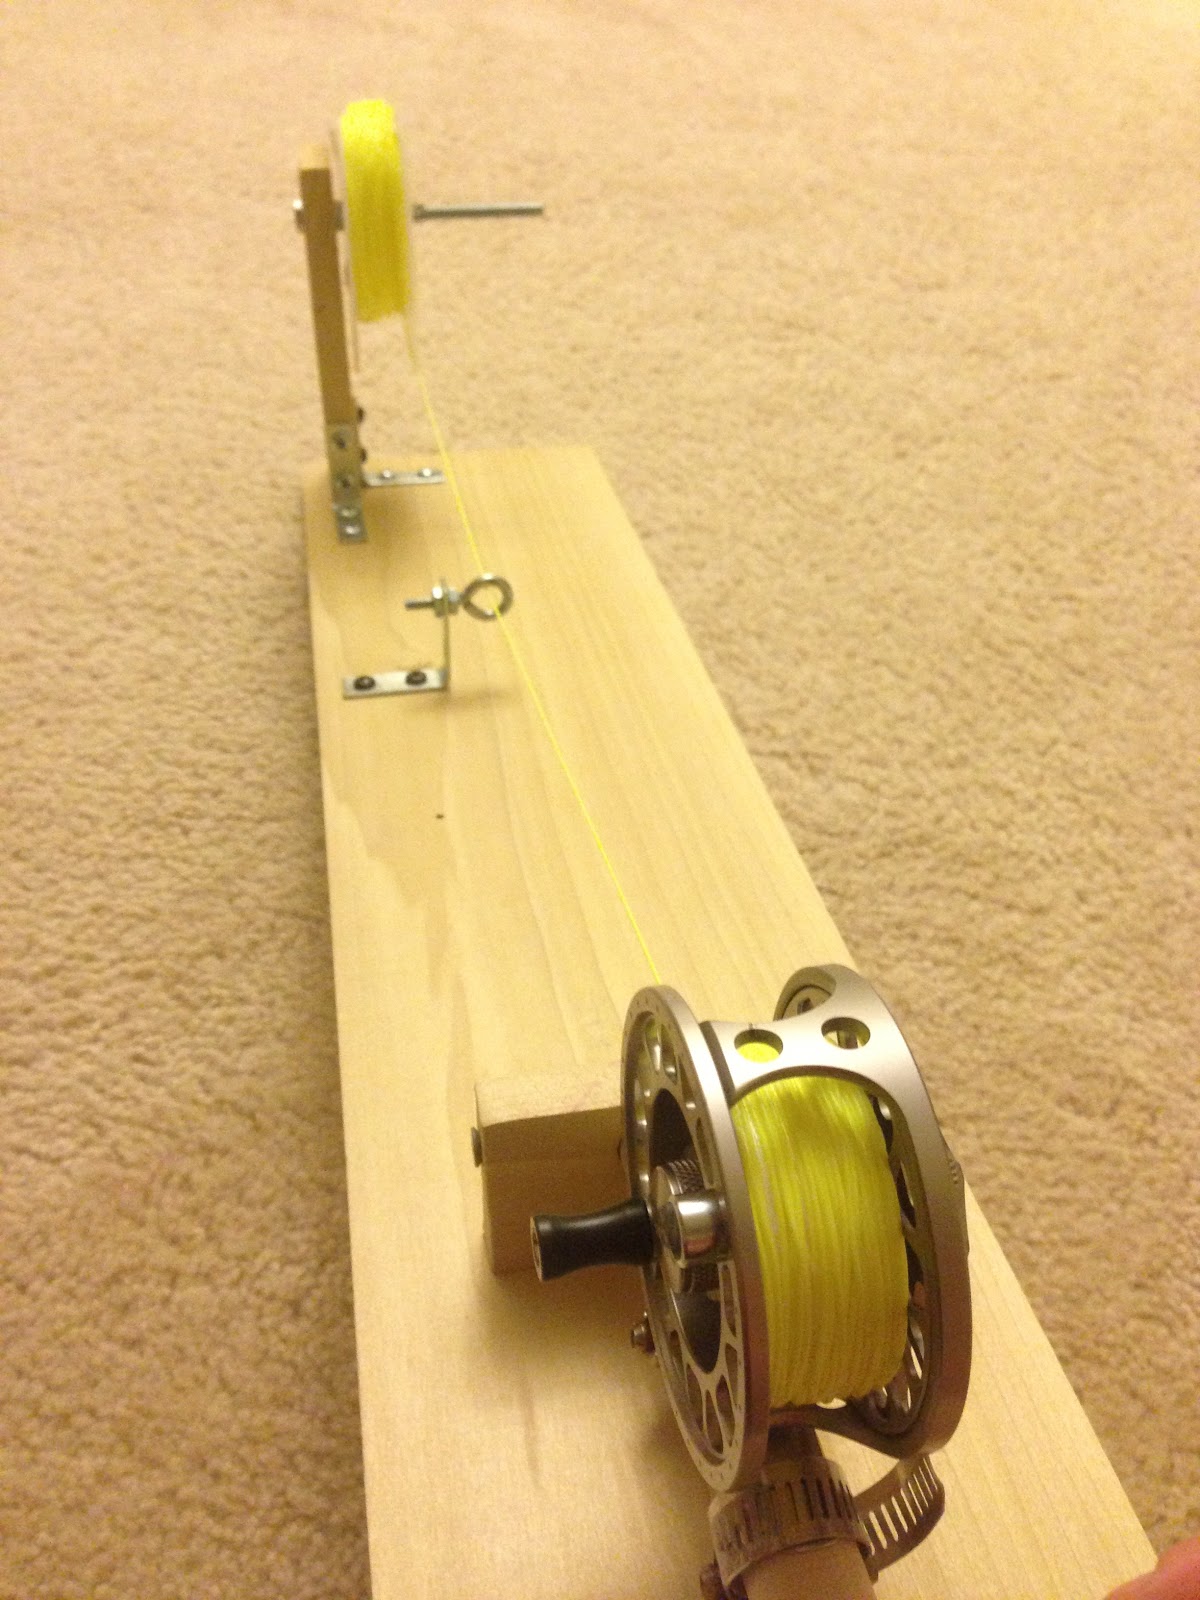

The first reel I decided to spool was the new Ichthus 3/4 we got from Risen Fly to try out and of course I spooled it up with Risen Fly backing and Alpha Fly Line. Its a easy and fun project to do and is absolutely worth the money simply based on its time saving potential!
Boom...Morgan
No comments:
Post a Comment